Wednesday 31 October 2012

Farmers Wife #47 ... HELP!!

I have googled and flickrd without success ... can anyone help me with how I should sew the 'y' seams in this block (#47 Homemaker)?


I really don't want to unpick anymore nor do I want to give up on it - it's such a pretty block:

Thank you :)

Sunday 28 October 2012

Raindrops on roses and ...

drinking a glass of red wine, watching the new series of Grimm whilst binding Aunty G's lapquilt ... these are a few of my favourite things which I am thankful for today :)


What's made your day lovely?

Saturday 27 October 2012

Farmer's Wife Fabby Friday (3)

Okay, you've got me, it's Saturday but it doesn't really matter, hey? 

Here are this week's six blocks - better late than never - that takes me up to 18 ... and they're not necessarily getting easier although I am learning as I go along. For example, if I square up the triangle pieces to match in size the square pieces before sewing them together, my seams match much better. Also, if I can get away with making some of the outside pieces a little bit bigger than the template, they're more likely to finish at an even 7" block.

So, here they are - I'm still sticking to pink, green and white scraps (with a little bit from my stash) i.e. no new fabrics.

#41 Friendship Star


#55 Linoleum


#61 Northern Lights


#69 Practical Orchard


#74 Ribbons


#94 Tall Pine Tree


And all 6 - do you have a favourite this week?


Friday 26 October 2012

A small finish :)

I hope you don't mind but I haven't finished a quilt this week but I did finish off a set of gifts for our lovely nephew and his girlfriend who popped down from Chester to stay with us for a few days. I'd love to share them with you.

Linking up to Crazy Mom Quilts Finish it up Friday

They've just moved in together so a few cushions were in order - for one I did a little paper-piecing tutorial (my first!) and the other two, I did different designs but used the same fabric:


And the backs:


And there was too much 'scraps' leftover so I used Ayumi's (Pink Penguin) cute tutorial to make this little sweet basket:


I couldn't let dear Tasha go home without a Pants Bag:


Oh, and there's no show without Punch! 


I've said it before, Nell has absolutely NO respect for my work ... none ... not a smidgen!

I'm planning a whole weekend of sewing:

# finish my 6 FWQ blocks - have only made 2 this week :(
# baste, quilt and bind Aunty G's lap quilt
# piece the back of Marisa's lap quilt

What have you got planned? Whatever it is, I do hope you have fun :)

Wednesday 24 October 2012

WIP Wednesday - Workshop with Mandy Munroe :)

I have started my Amsterdam lap quilt for dear SIL :) and I started it today at the cutest little quilt shop in Rochester - Hometown at the best workshop I have been to in ages. I am soooooooo happy because (in no particular order):

1) A day off from work in the week is a luxury - and a whole day off to go quilting was just to die for

2) The other ladies in the workshop were delightful: friendly, funny and FAST!!

3) Mandy Munroe is a lovely teacher ... all the 'Is' - inspiring, interesting and inclusive- a Brit who lives in New York, so how lucky did we all feel to get to do a whole day's class with her? This is her 'Town Scape Quilt' - my photos really do not to it justice (her workmanship is sublime):


and the scrappy back:


There were 8 of us in the class - no beginners (though all the ladies were much more experienced than I!) which meant we could get straight on with it. So after, a great introduction from Mandy, we were off like racehorses at Aintree!

Although Mandy had given us a very comprehensive pattern, I knew I would be deviating (slightly) because I am inspired by this reminder of our holiday in September, so I went 'native':


and I made up my own measurements as we went along, whilst still following all the guidance and top tips. This is part of my first block (I won't show any more for now because dear SIL reads my blog):


And here is some of the stunning work the other ladies produced (sorry if I've mixed up your names and blocks):

Pascale (she was FAST!):


Pat:


Jill:


Sally:


Mary:


Claudia:


Ann (she was fast too and talks to herself - glad I'm not the only one!):


Lessons learned:

1) Stop using steam, start using starch
2) How to free-form curve (for gabled roof-top)
3) Use cutting board lines and ruler together when squaring up

I have had a wonderful day - I met some lovely ladies and have started a new project. Hope you've had a good day too.

Linking up to Freshly Pieced's WIP Wednesday ;) 


Sunday 21 October 2012

Paper pieced cushion ... a little tutorial

I'll be honest with you, I'm a bit nervous about posting this - my first tutorial - because I am not an expert paper-piecer but I found it helpful to take some photos whilst I was making this cushion top to remind me of what I had done. Also, I need to record the process for the future - I think it might be my age (44.5!) - cos I know I'll forget what goes where and on what side by the next time I come to paper piece :) 

I don't know how you start a new project ... sometimes I start with a pattern, then choose my fabric to match and other times (like this one) I buy the fabric first and wait for the inspiration fairy to come a calling! Out of this bundle of gorgeousness, I'll be making 3 cushions: 2 x 18" and 1 x 22" for our dear 20 year old nephew who has recently moved into his first home with his adorable girlfriend:


I then get my pen and ruler out and draw a pattern to fit the 18" square and choose which fabric goes where:


So, I now know I need my square in a square to measure 10.5" and I cut and sellotape two bits of foundation paper together and I draw a 1/4" seam within the square and then draw the inner square by measuring out points at exactly half way along each edge:


Using my window as a light box, I pin a centre square of fabric big enough to overlap the lines by at least 1/4" on the side without the lines on:


You don't have to make a template for the surrounding triangles but I like to, this makes sure I don't under measure when cutting (yes, have done that once or twice before):


You're now ready to sew the first two pieces together. Personally, I don't play around with my stitch length (though I have read elsewhere that you should shorten it to 12-18 stitches per inch) and I don't pre-perforate (hey, this process is long enough already!) If you want to be sure your points measure up, you can fold your triangle in half and match it up to the corner like this:


Do a couple of back stitches at the beginning and end and sew on the line:


Fold back the paper and trim to a tidy 1/4" seam:


Press and here is your first bit:


I like to do the opposite side next:


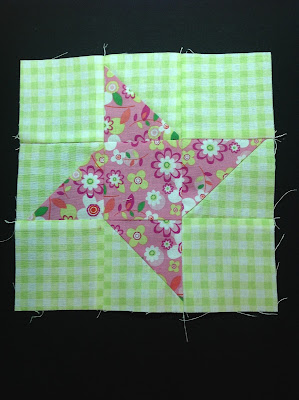
Do all four corners in exactly the same way, press and carefully remove the paper and voila, your perfectly straight-lined square in a square:


Now, a little tip for making sure the strip you sew on next sits perfectly alongside your point, sew your 1/4" seam just a breath away from that corner seam:


And it looks precise and lovely:


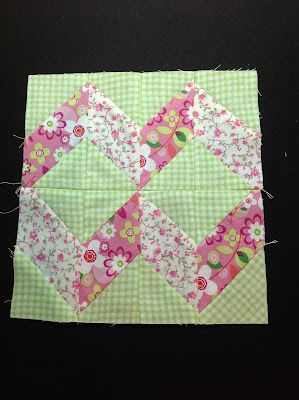
And after all the strips have been sewn on, you have a finished top of 18.5":


And the finished cushion, I free motion quilted some wavy lines on the seams and meandered / stippled the centre square:


And here's all three, I really LOVE that little black velvet apliqued heart:


And the backs. I do simple flap overs (I must teach myself how to put in a zip ... someday (sigh!)) out of leftover front fabric, if I have enough, roughly 2/3 of the cushion (so for the 18" cushion, I cut 2 x 12.5"):


That was fun - I do hope you enjoyed this little tutorial :)


Friday 19 October 2012

Finish it up Friday :)

As well as my 6 new FWQ blocks this week, I also finished this lap quilt top for dear hubby's cousin, Marisa.

This will be a surprise gift for Marisa - she lives  in Harrisburg, PA but loves all things English country garden which inspired me to bring these bright fabrics together. 

l

This is my own pattern (in that I made it up as I went along!) and the finished quilt will be about 60" x 60". It's been a lot of fun making this - wouldn't usually put pink and orange together - do you think it works?


Just have to piece the back now, oh and baste, quilt, label and bind it ... so very very glad its the weekend :)

Linked up to Crazy Mom Quilts - Finish it up Friday

Farmer's Wife Fabby Friday (2)

Welcome to my second week of Farmer's Wife blocks - I now have 12 ... yay!

Before I intoduce you to these little sweeties, let me share a heart-warming story about a real Farmer's Wife, Janet Howes, who passed away after 33 years of married life.

The story tells you about her husband Winston, now aged 70, who spent a week planting a meadow of oak saplings after his wife of 33 years Janet died suddenly 17 years ago. I'm warning you now ... grab a tissue!

The giant heart formed with 6000 oak trees which Winston Howes planted in memory of his late wife Janet. Photo: Andy Collett / SWNS.com

Isn't love grand? I was Google searching and just came across it - just HAD to share it with you all:)

If you have recovered, please feast your eyes on this week's six blocks. So far, I'm hitting my mini-target and am still enjoying making these cute little blocks, even though a couple were a bit tricky this week.

First up, #8 Bouquet:


#16 Calico Puzzle:


The next one was a little tricky - 25 separate pieces and, despite my utmost concentration, it was only after I had pressed and trimmed, that I realised that I hadn't placed the flower blocks on diagonal sides ... oh well, never mind, I still like it!

#19 Checkerboard:


#21 Contrary Wife. Ha, that's soooooooo me:


#30 End of Day:


#54 Kitchen Woodbox


And all six together:


Do you have a favourite this week?


CLICK HERE TO SEE LAST
WEEK'S 6 FWQ BLOCKS: